
Workflow nodes and their availability
1. Inspect the available nodes
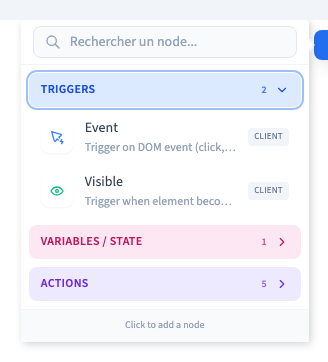
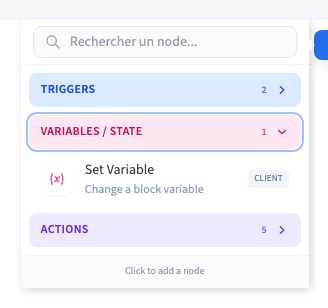
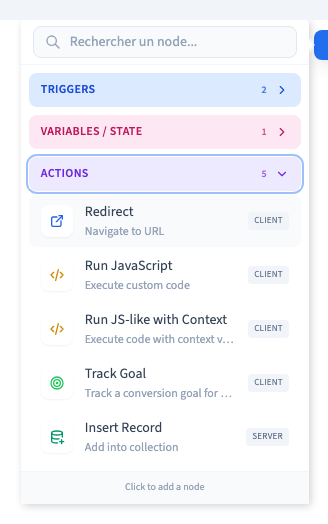
Open Add node in the workflow editor. The current menu offers eight types across Triggers, Variables / State and Actions. The two JavaScript actions are intended for developers. You can build a first workflow using only the visual controls.
Could not play. Try the video controls.
2. Read the workflow node reference
| Node or technical declaration | Visual menu | Declared context |
|---|---|---|
| Event, Visible | Available | Client |
| Webhook, Record Change, Scheduled | Unavailable | Server |
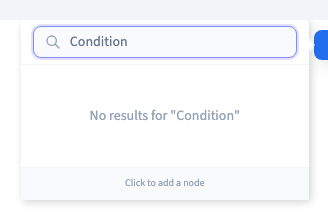
| Validation, Transform, Filter, Condition, Router | Unavailable | Client and server |
| Variable Change (Set Variable) | Available | Client |
| Set State, Delay | Unavailable | Client and server |
| Schedule | Unavailable | Server |
| Redirect, Run JavaScript, Run JavaScript (Context), Track Goal | Available | Client |
| Notification | Unavailable | Client |
| DB Insert (Insert Record) | Available | Server |
| Update Record, Delete Record, API Call, Send Email, Mailchimp, ConvertKit | Unavailable | Server |
| Error Handler, Retry | Unavailable | Client and server |
Client refers to the visitor’s browser and server refers to server-side processing. The context column describes the intended execution environment for each type.
3. Verify a saved and published workflow
First check that the node is available in the menu. Next, save, reload and check that its settings and connections are still there. Finally, publish and test the outcome with fictitious data. Check the destination reached after a redirect, and confirm that a collection action actually creates the intended record with the right permissions.
See also Build your first visual workflow.