
Choose a value and unit
A setting may offer presets, a number field, units or a specialised selector. Choose according to the property and the result you want.
1. Identify the active row
Select the element and open the property. Locate its base value and conditional rows. The demonstration heading already has sizes for different widths: changing the base does not automatically replace sm or lg values.
Could not play. Try the video controls.
2. Try a preset
Open the value selector and choose a visual option. Where a hover preview is available, compare choices before clicking to keep one. A preset name is a useful reference, but check its actual size or effect on your page.
3. Enter a number and choose the unit
When the control allows it, enter a number and choose an available unit. px means pixels; rem expresses a size relative to the page's reference text size. The same number in these two units does not have the same effect. Available units depend on the setting.
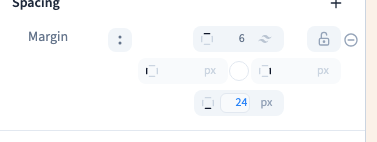
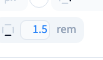
The video uses the heading's bottom margin to compare 24 px and 1.5 rem. When the reference size is 16 pixels, those values produce the same space. If the reference size changes, the rem value follows it.
4. Use the available adjustment controls
Some controls have a slider or mouse adjustment; others use buttons or lists. Use the control shown rather than expecting every property to behave identically. Entering a number in a visual control is still nocode editing.
5. Check several widths
Compare desktop and phone after applying a value. If nothing changes, check the target, unit and rules that may take priority. If the value causes overflow or makes the text hard to read, choose a more suitable value or undo. Save when the result is right.