
Build the site menu
A menu helps visitors find their way. Begin with a few useful destinations: home, your offer, an introduction and a contact page. Creating a page does not automatically add it to the menu.
1. Open the menu beside the page
Open a page in Design, choose Easy, then click the managed menu in the header. Site menu opens beside the real page, so you see your choices with the site's theme. You can also open Site → Menu.
This article concerns Communik's managed menu. An older header made of individual links needs to be taken over first. A menu in a shared header serves the pages using that header.
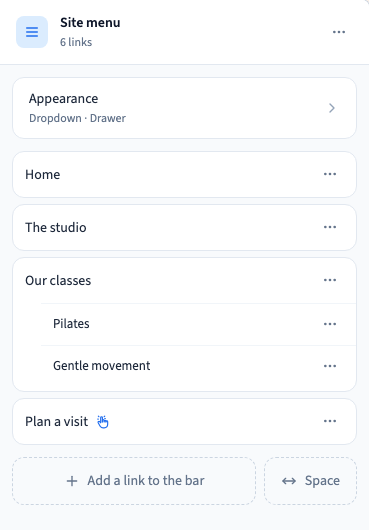
2. Add a destination
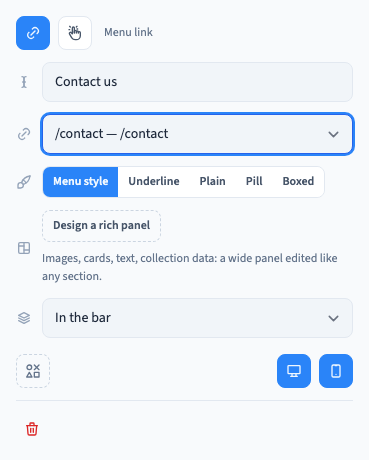
Click Add a link to the bar. Enter a Label, then choose an existing page in Destination. The label is the text visitors see and may differ from the page name: “Contact us” can lead to the contact page.
Choosing the page from the list preserves its relationship with the link. Changes appear while you complete the form. Back returns to the list and keeps your changes; Save stores the work. In the recording, the new entry appears in the actual header.
Could not play. Try the video controls.

3. Arrange links and sub-menus
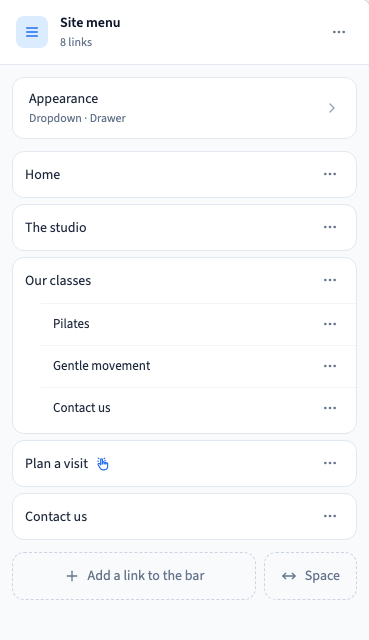
Drag a row to change its position. Drop near a row's edge to reorder it, or in the middle of the highlighted parent to nest it. Children follow their parent.
The + shown when hovering over an entry adds a child. For an entry without children, Place in the menu also lets you choose a parent without dragging. The recording uses this selector to put “Contact us” below “Our classes”.
The menu supports three levels: the bar, sub-links and titled columns in a wide panel. A fourth level is not offered. Two levels are usually enough for a simple site.
A parent without a destination only opens its sub-menu. If you also give it a page, test how visitors open its children on a phone.
4. Duplicate, remove and undo
A row's … menu offers duplication and removal. A parent can also be duplicated or removed with its children. Copies have separate identifiers and need their own translations.
Use the builder's Undo command to reverse these actions. Removing a menu entry does not delete its destination page. Removing a parent with its children removes those entries from the menu.
Space adds a flexible gap between desktop groups, for example before a booking action. It adds no phone destination. The demonstration duplicates a link, removes a copy, undoes that removal and adds a space.

5. Save and test as a visitor
Save, reopen the page and check that the entries remain. Try every destination in visitor preview or on the published site. On a phone, open the menu and its sub-menus; a closed bar does not show whether its links work.
Saving the menu and publishing the site are separate actions. Publish when the changes are ready for visitors.
Continue
Configure individual entries · Choose desktop and phone appearances