
Configure each menu entry
Each menu entry has a purpose. A link leads to a page, a button highlights an action, and a heading groups destinations. Choose that purpose before adding decorative details.
1. Choose the entry role
Open Site menu and select a row. Link suits ordinary navigation. Button highlights the main action, such as “Plan a visit”. Heading labels a group without navigating; a Separator divides entries. Space, added from the list, separates desktop groups.
Headings, separators and spaces do not replace a working destination.
2. Set the destination
Choose a page in Destination to keep the entry associated with that page. Another address… opens free entry for a website address, page path, anchor, email or phone number.
Use https:// for another website, #contact for an existing section on the current page, mailto: for email or tel: for a call. An anchor does not create the target section.
Open in a new tab concerns external addresses entered here. Use it when leaving the current site would interrupt the intended task. An internal page chosen from the list follows normal site navigation.
A parent can have no page and only open its sub-menu. An entry without children needs a useful destination.
3. Add helpful details
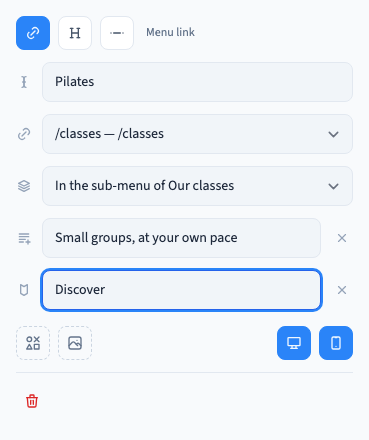
For a sub-link, Second line adds a short description and Badge adds a brief marker. The recording saves “Small groups, at your own pace” and “Discover” for Pilates.
Icon opens the pictogram selector for a compatible entry. Image opens the file manager for a sub-link. Keep the label understandable without these additions.
The menu appearance determines where details are shown. A narrow list and a wide panel do not present the same amount of information. Compare the actual desktop and phone results.
Could not play. Try the video controls.
4. Highlight one main action
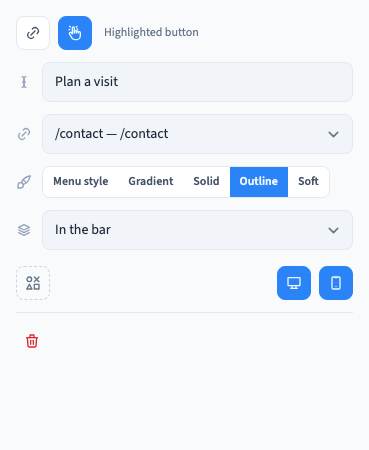
Choose Button for your main action. Keep the menu-wide button style or choose an entry-specific style such as Outline. The recording applies an outline to “Plan a visit” and checks it in the header.
An older menu may retain a historic appearance. Open Appearance and apply the current settings first when prompted.
A menu button is still a link. Its shape does not create a form or booking process; the destination must provide that functionality.

5. Check visibility, languages and persistence
The screen controls determine whether an entry appears on desktop and phone. Read their active state before hiding an important destination.
An entry's identifier carries its translations. Changing its wording requires reviewing other languages; duplication creates an independent entry. This demonstration uses English.
Return to the list, save and reopen the menu. Test destinations and visibility in visitor preview.