
Add, edit and remove a setting condition
A condition gives the same setting another value in a particular situation: from a screen width upwards, during hover or while an element is pressed. It lets you keep a clear base and describe only the differences.
This guide uses the visual controls in Expert mode. No code is needed.
1. Read the lines before editing
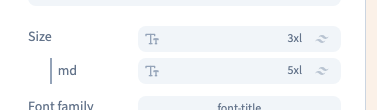
Select an element and find the setting. The unqualified line is its base. A badge such as md, lg or hover identifies a conditional line.
Changing a preview width does not create a condition. Select the line whose badge matches the behaviour you want to edit.
2. Add a condition
Hover over the setting's label and use its condition menu. Choose a screen shortcut such as Tablet, or a state such as Hover. A new line appears for the same property; give it its own value.
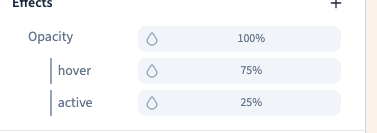
In the screen example, the heading keeps a 30 px base and uses 48 px from tablet width upwards. In the interaction example, opacity stays at 100% normally and changes during hover or pressure.
Could not play. Try the video controls.
Could not play. Try the video controls.
3. Change the value or its scope
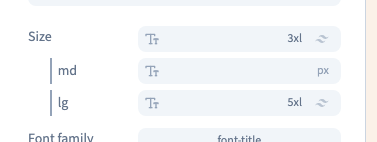
Open a conditional line's value to edit that value alone. To change when it applies, click its badge, change the condition and confirm with Set modifier.
The screen demonstration moves an existing md rule to lg. The larger heading then begins at desktop width rather than tablet width. This edits a rule instead of adding a duplicate.
Conditions can be combined when the editor offers that combination. Read every badge and test all required situations: a wider-screen hover condition requires both that width and hover. Do not assume selecting a preview automatically adds either condition.
4. Remove only the intended line
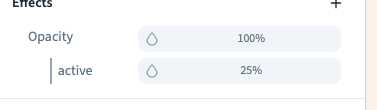
Hover over the conditional line and use its remove command. The base value remains. Remove the setting's base only if you intend to stop defining that base as well.
Use Undo to recover a mistaken removal. The demonstrations remove a conditional value, verify the base is preserved, then recover the condition.
5. Collapse conditions when the panel becomes crowded
The style panel filter menu offers Collapse modifiers to simplify the display. Expand them again before editing a particular value. Collapsing does not remove or disable rules.
Data expressions and custom selectors are separate technical options; they are not needed for these visual steps.
6. Check the result, then save
For width conditions, compare small and wide frames. For interaction states, test an actual hover or pressure and the return to normal. Save and reload to check persistence.
Keep rules sparse and purposeful. When the result is surprising, first check which element, property, badge and value are active; adding more conditions can hide the cause.